How To Make Sunglasses!
As part of our awesome summer of adventure, we’re always thinking about ways to stay cool and look cool, be it trekking through the desert or just cruising down the street. How's that gonna happen? With epic origami shades, that’s how! Here is our step by step guide on how to get creative and make your own!
Every once in a while, the sun will be so bright. you're compelled to shield your eyes or even close them. This is an impractical way to enjoy the day, and that's when we turn to one of the greatest inventions ever – sunglasses.
If, like us, you're forever asking, 'Where did I put my sunglasses? and you've found yourself in a particularly bright desert, then this handy DIY demonstration is for you!

You Will Need:
- A piece of A4 paper
- A pencil
- Some coloured pens or crayons
- Decorations – anything from stickers to glitter, glue and squishies, to even jewels - let your imagination go wild!
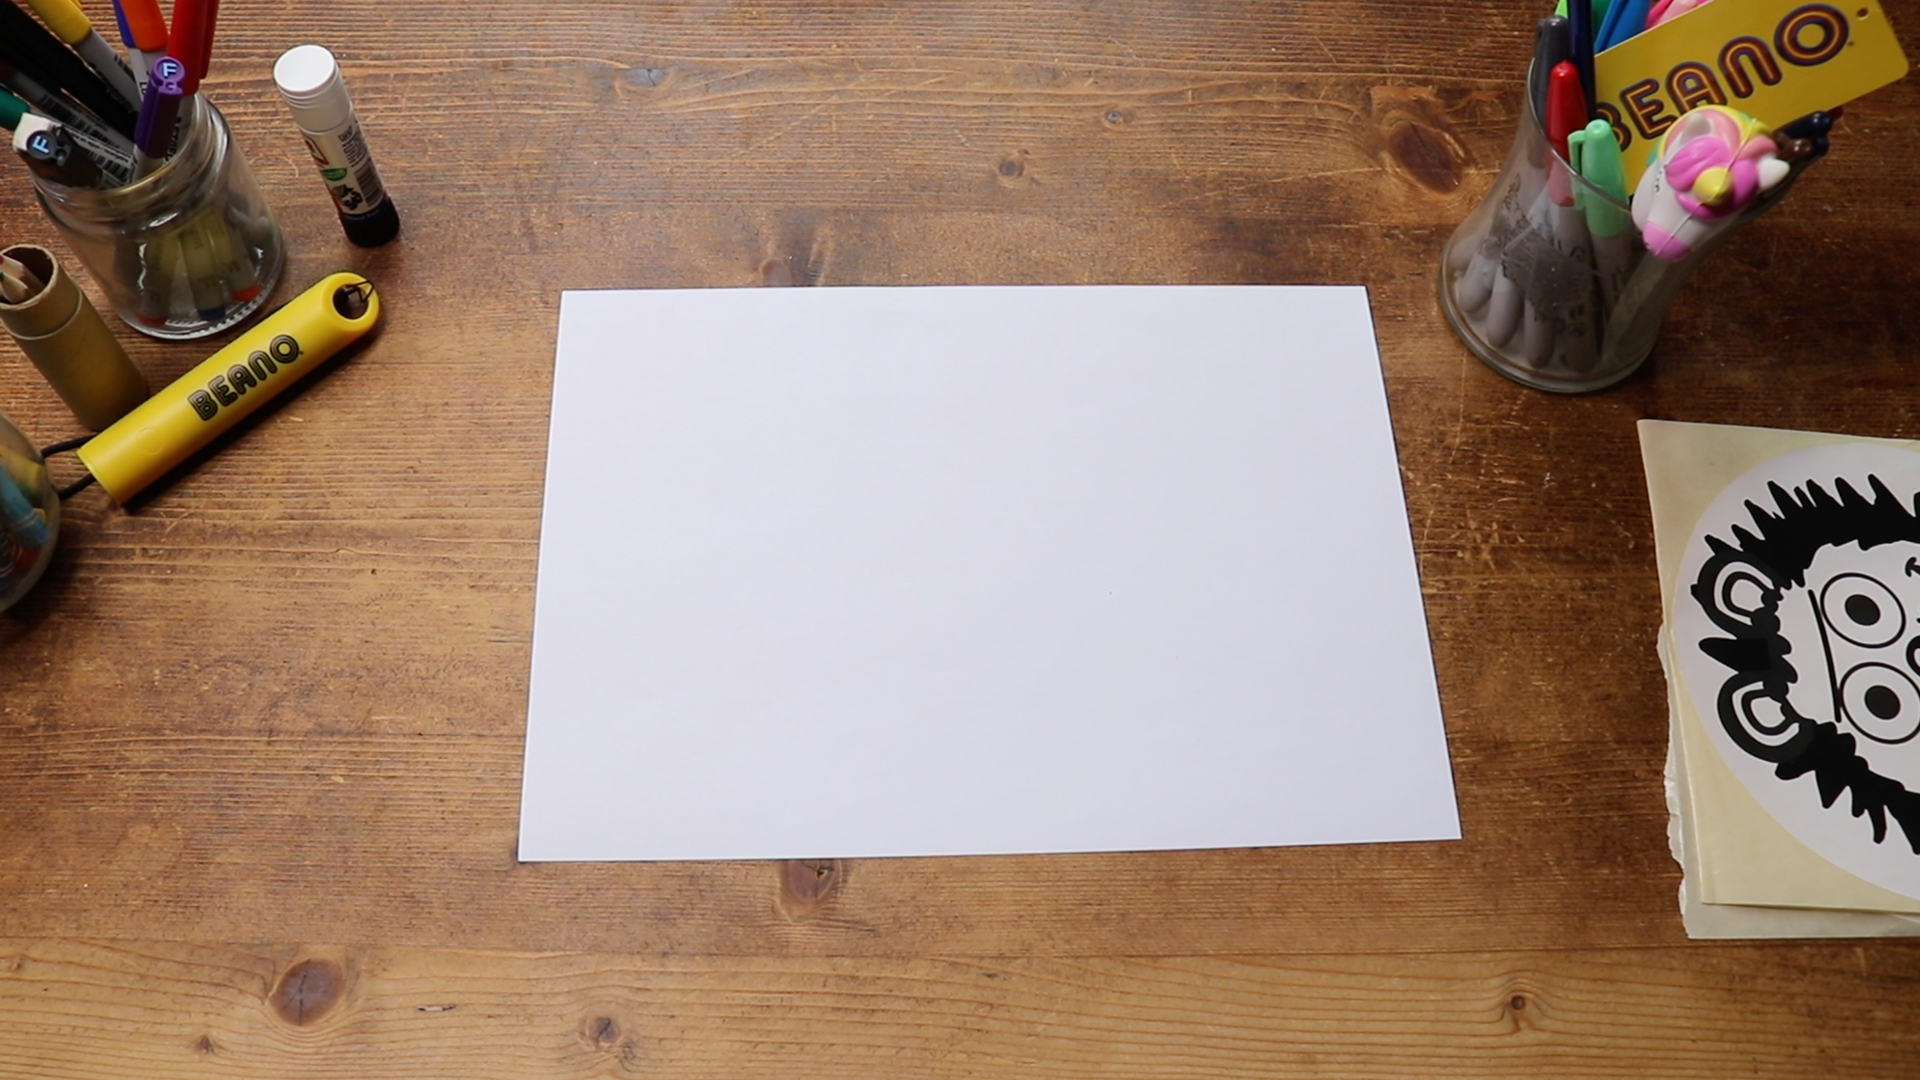
Step 1
Get those materials ready! Are you ready to look SO super-cool that when you walk down the street people will not stop staring and some even crowd around you asking questions such as "Where did you get those amazing sunglasses?" and "Are you alright?"
Then let's do this. grab yourself a piece of A4 paper in a colour that you really like. Don’t worry if you only have plain paper as you’ll decorate it later!

Step 2
Okay, so this step will make everything else a bit easier! Label your corners in light pencil A, B, C & D on the paper. Don’t worry, you won’t see these when you’re done.
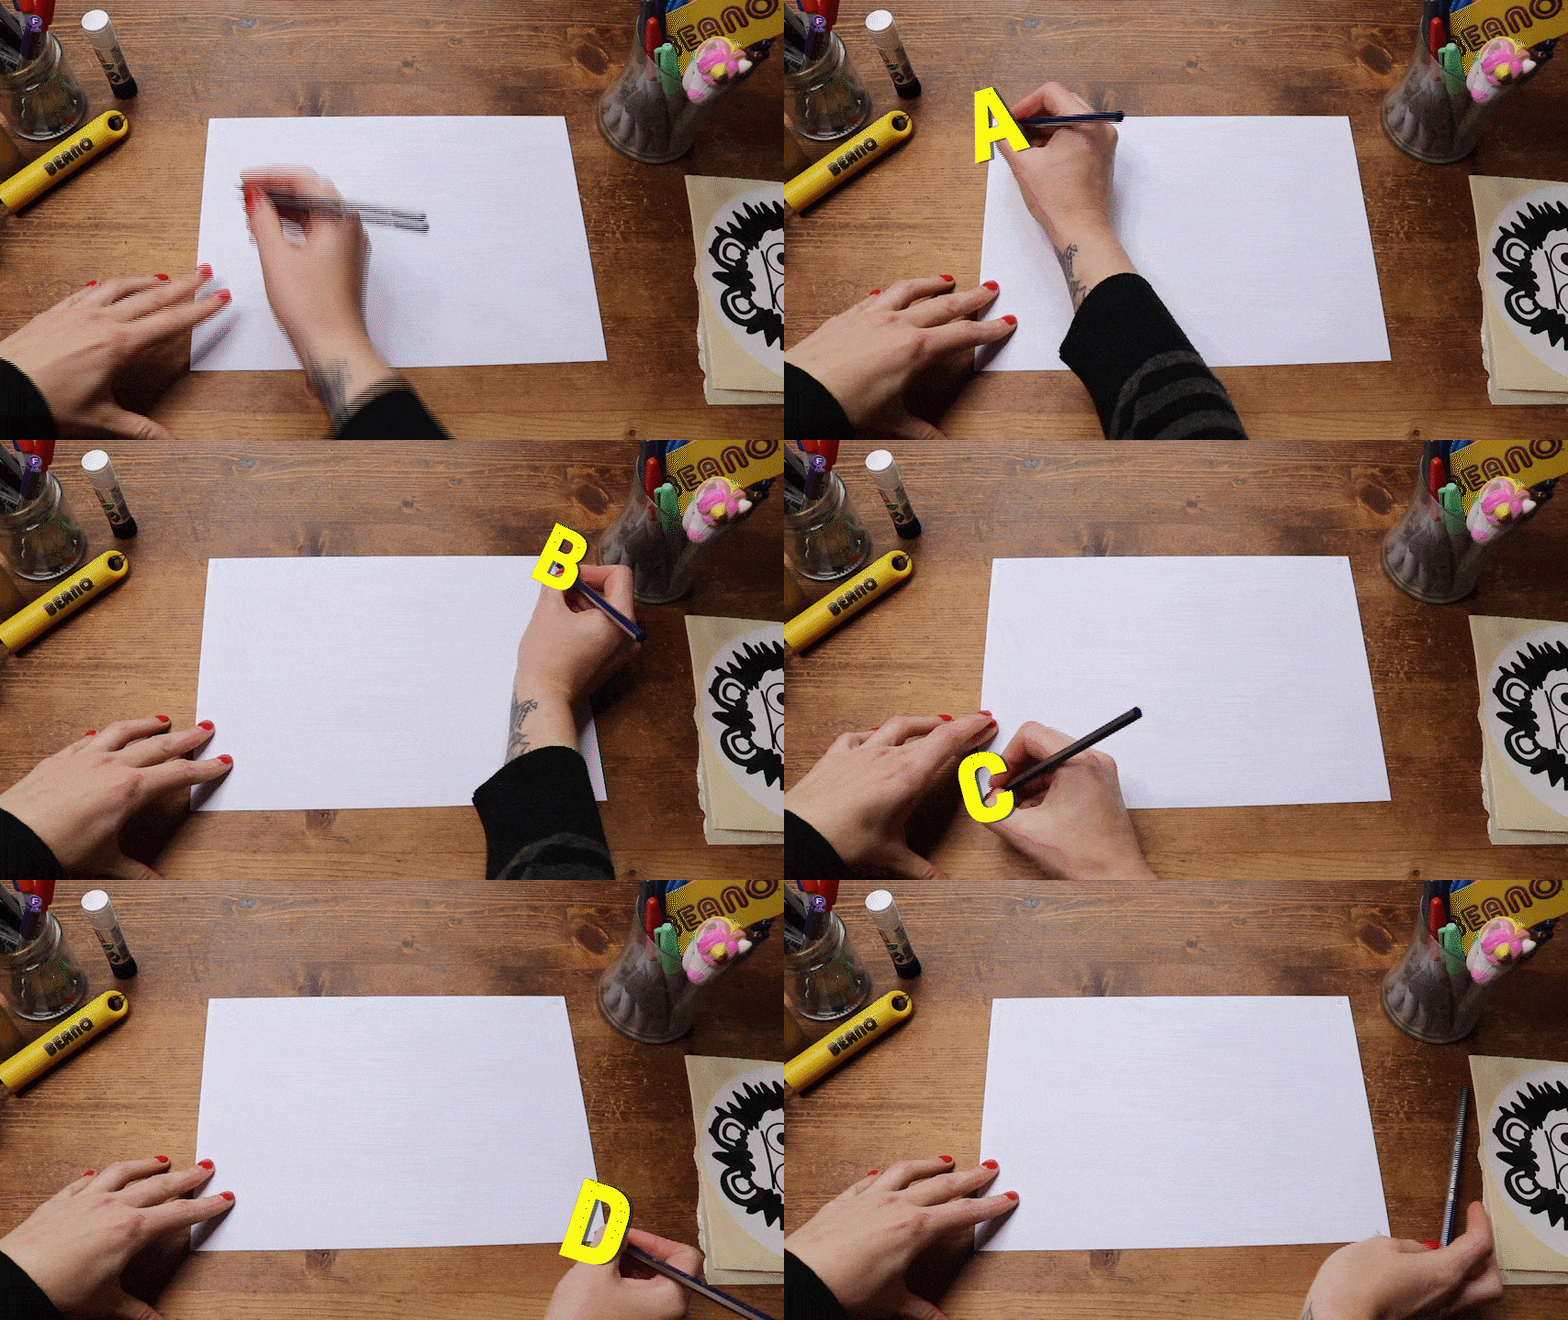
Step 3
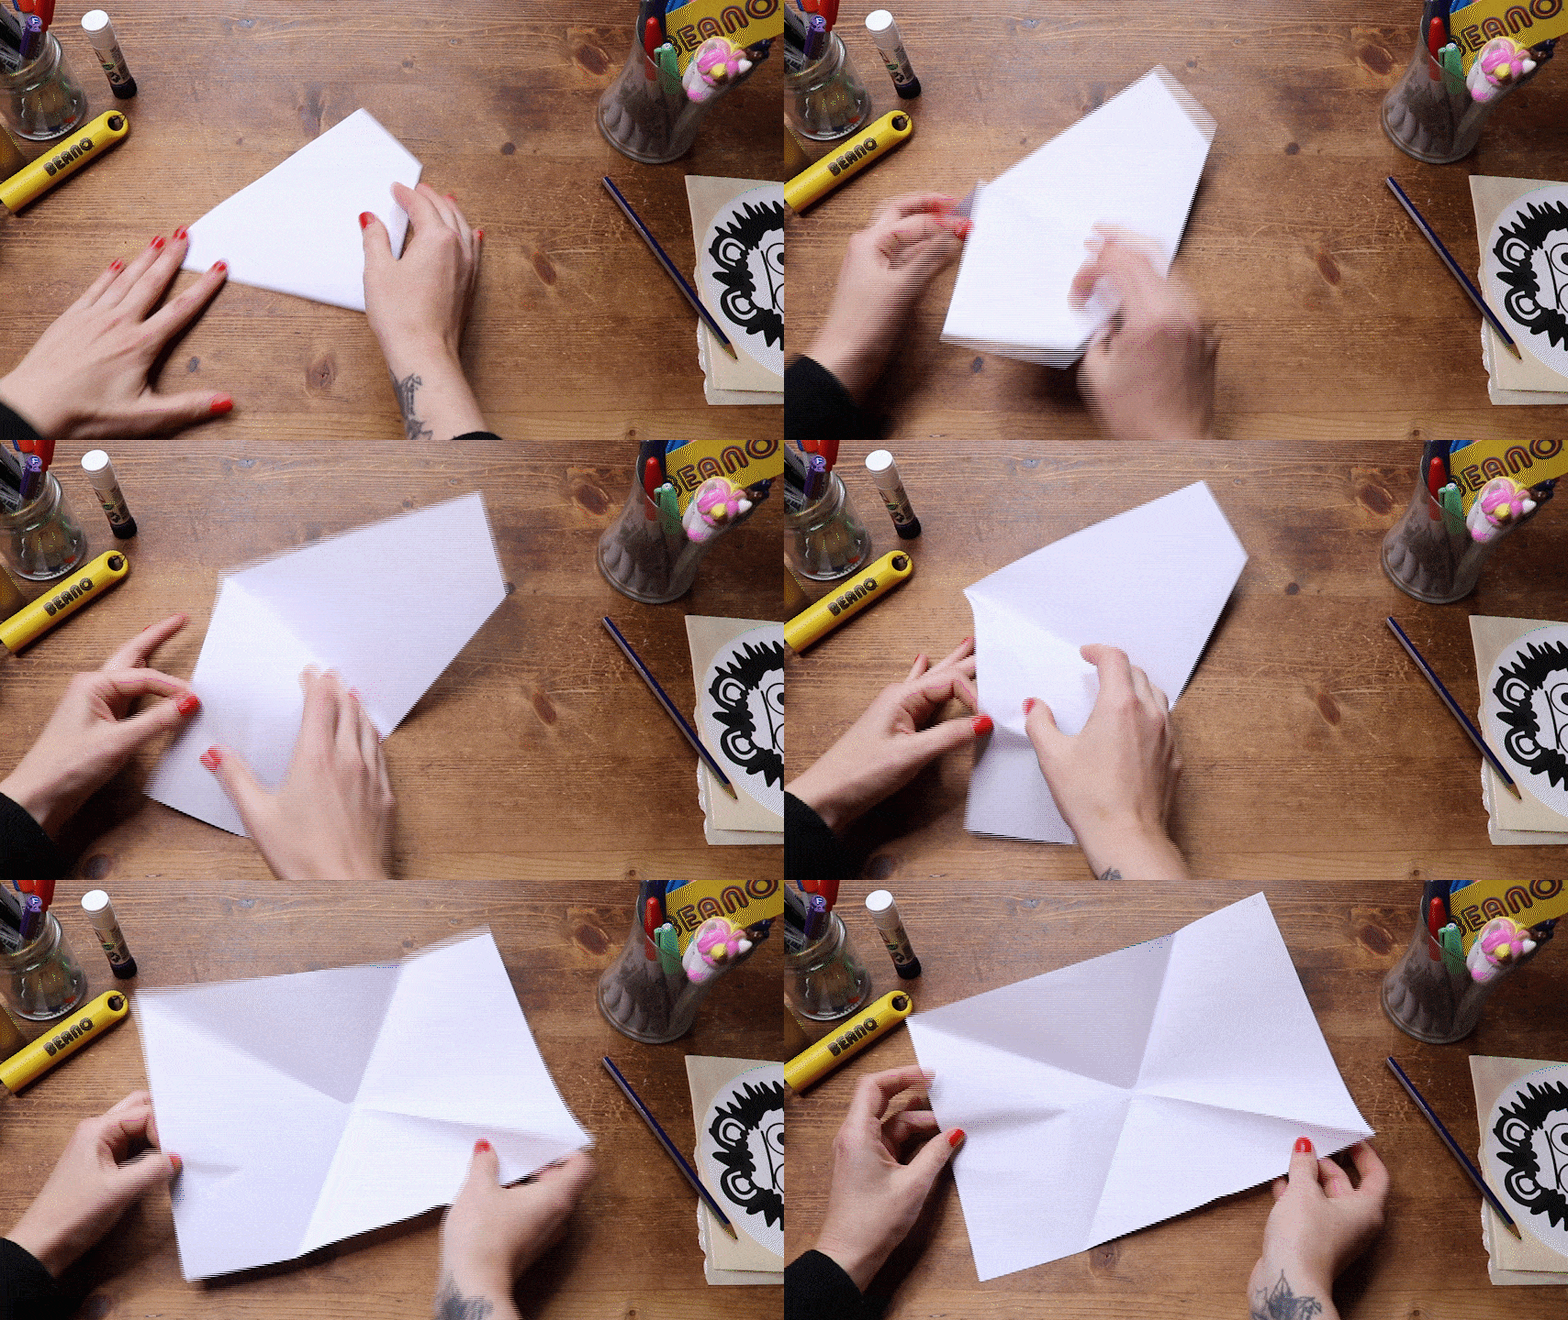
Time to fold your paper! Start off, by folding corner D to corner A on the other side of the page…
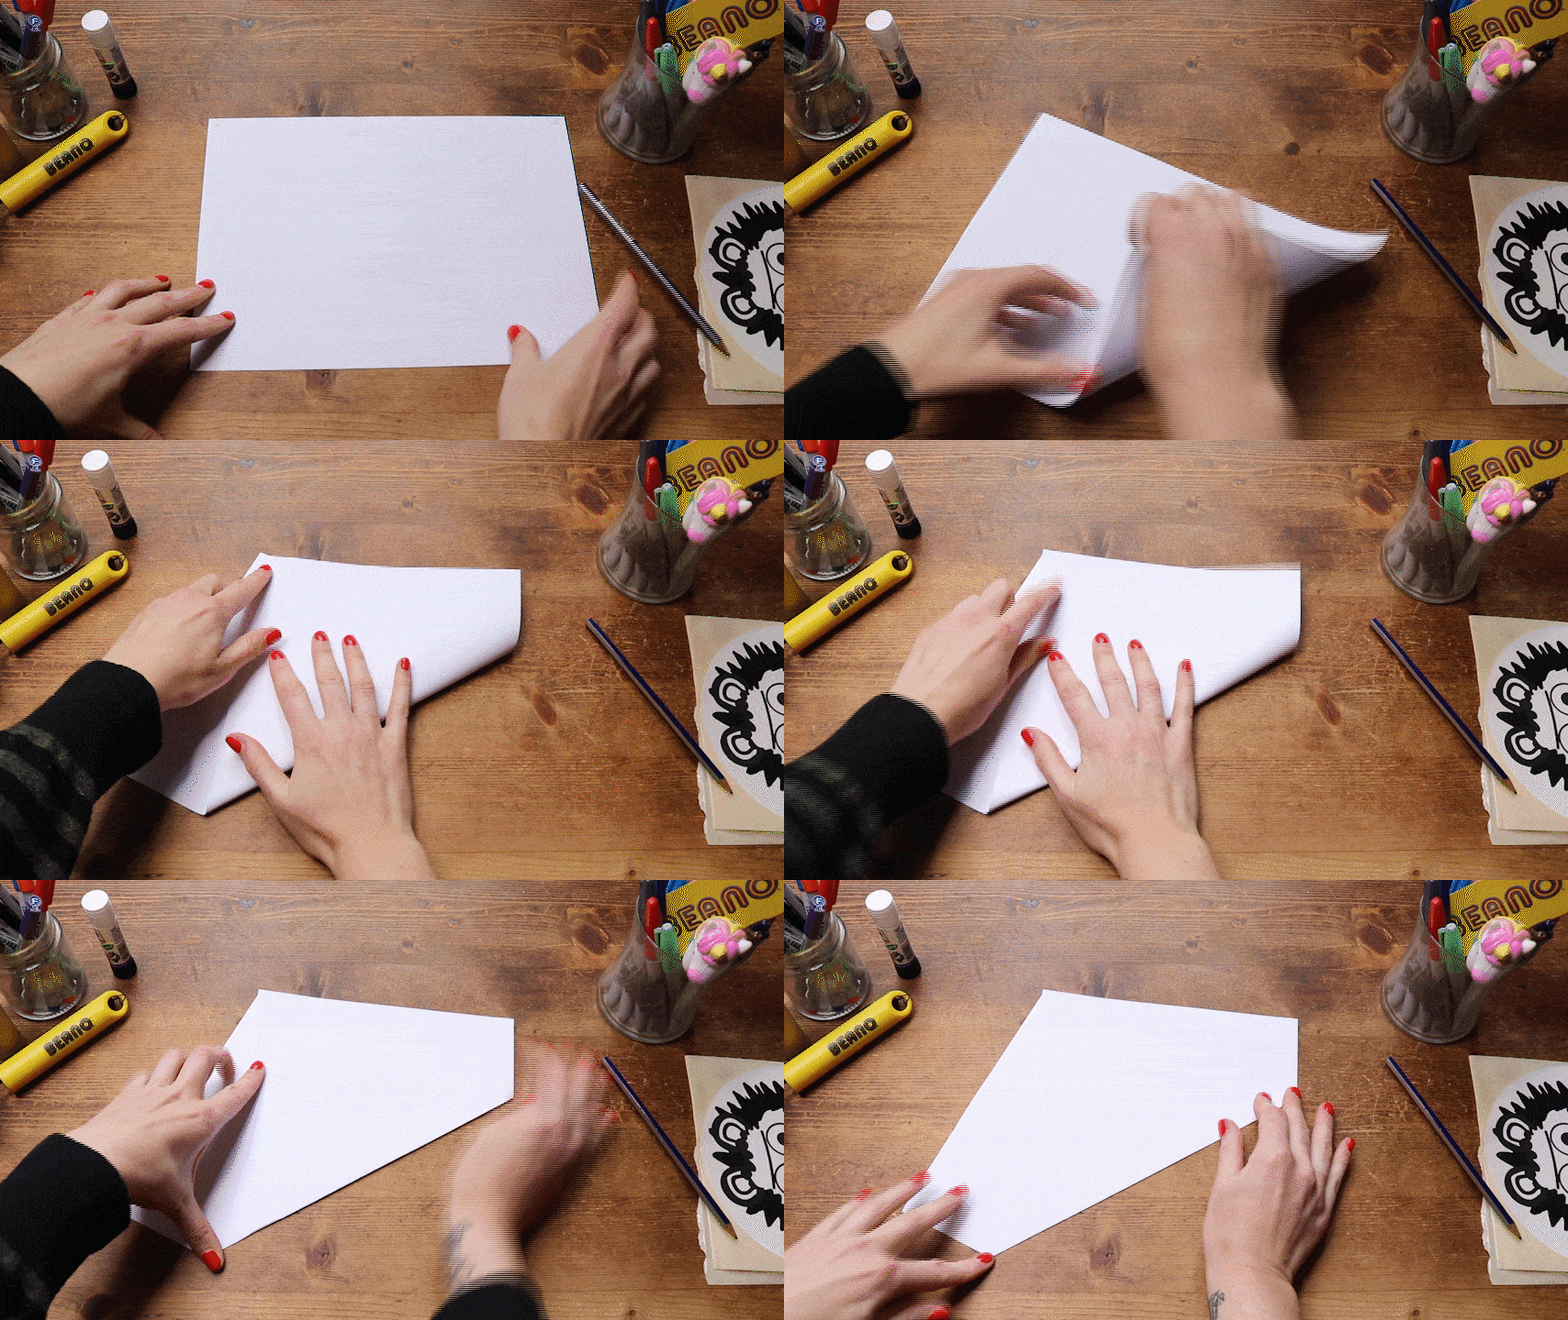
Step 4
Now it's time to fold corner C to corner B…
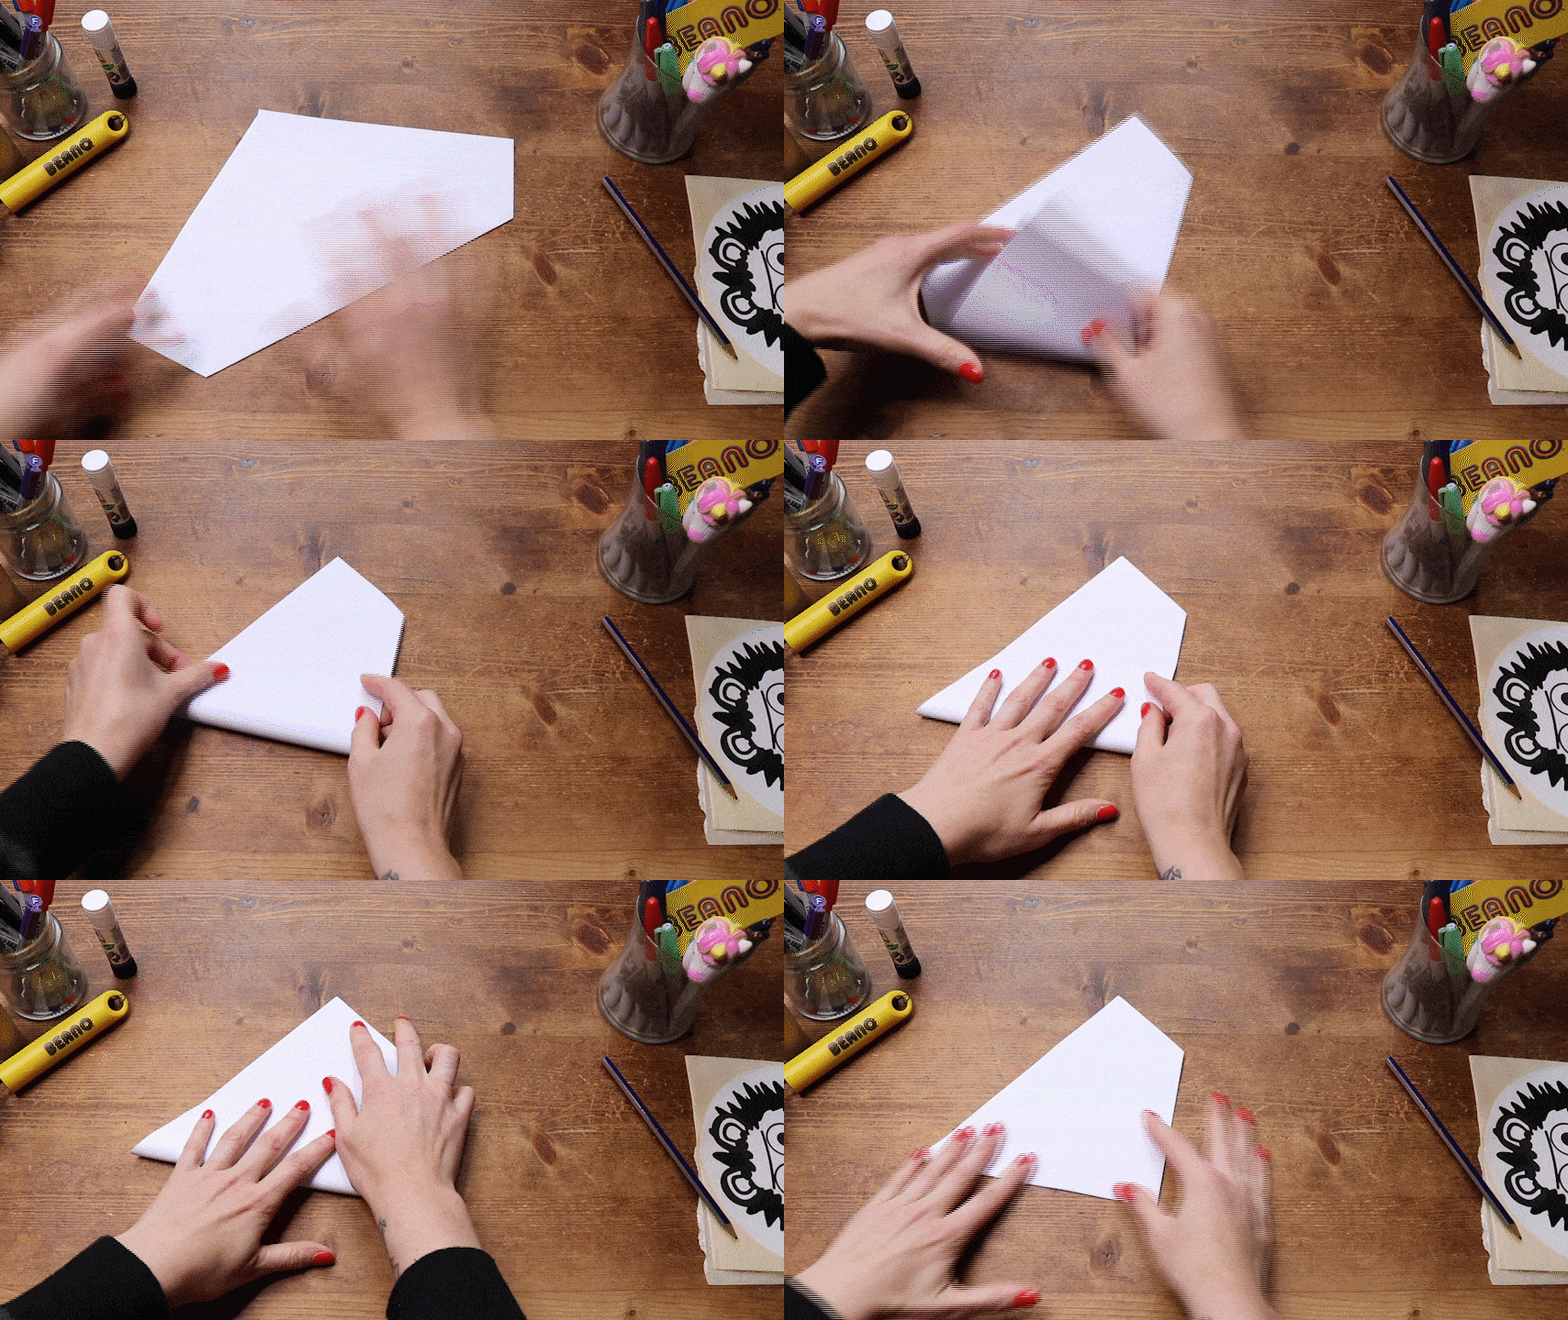
Step 5
Just as you've finished folding, unfold the paper back to how it was originally. Don't blame us, blame origami. That’s right, open the paper up. Nice.
Step 6
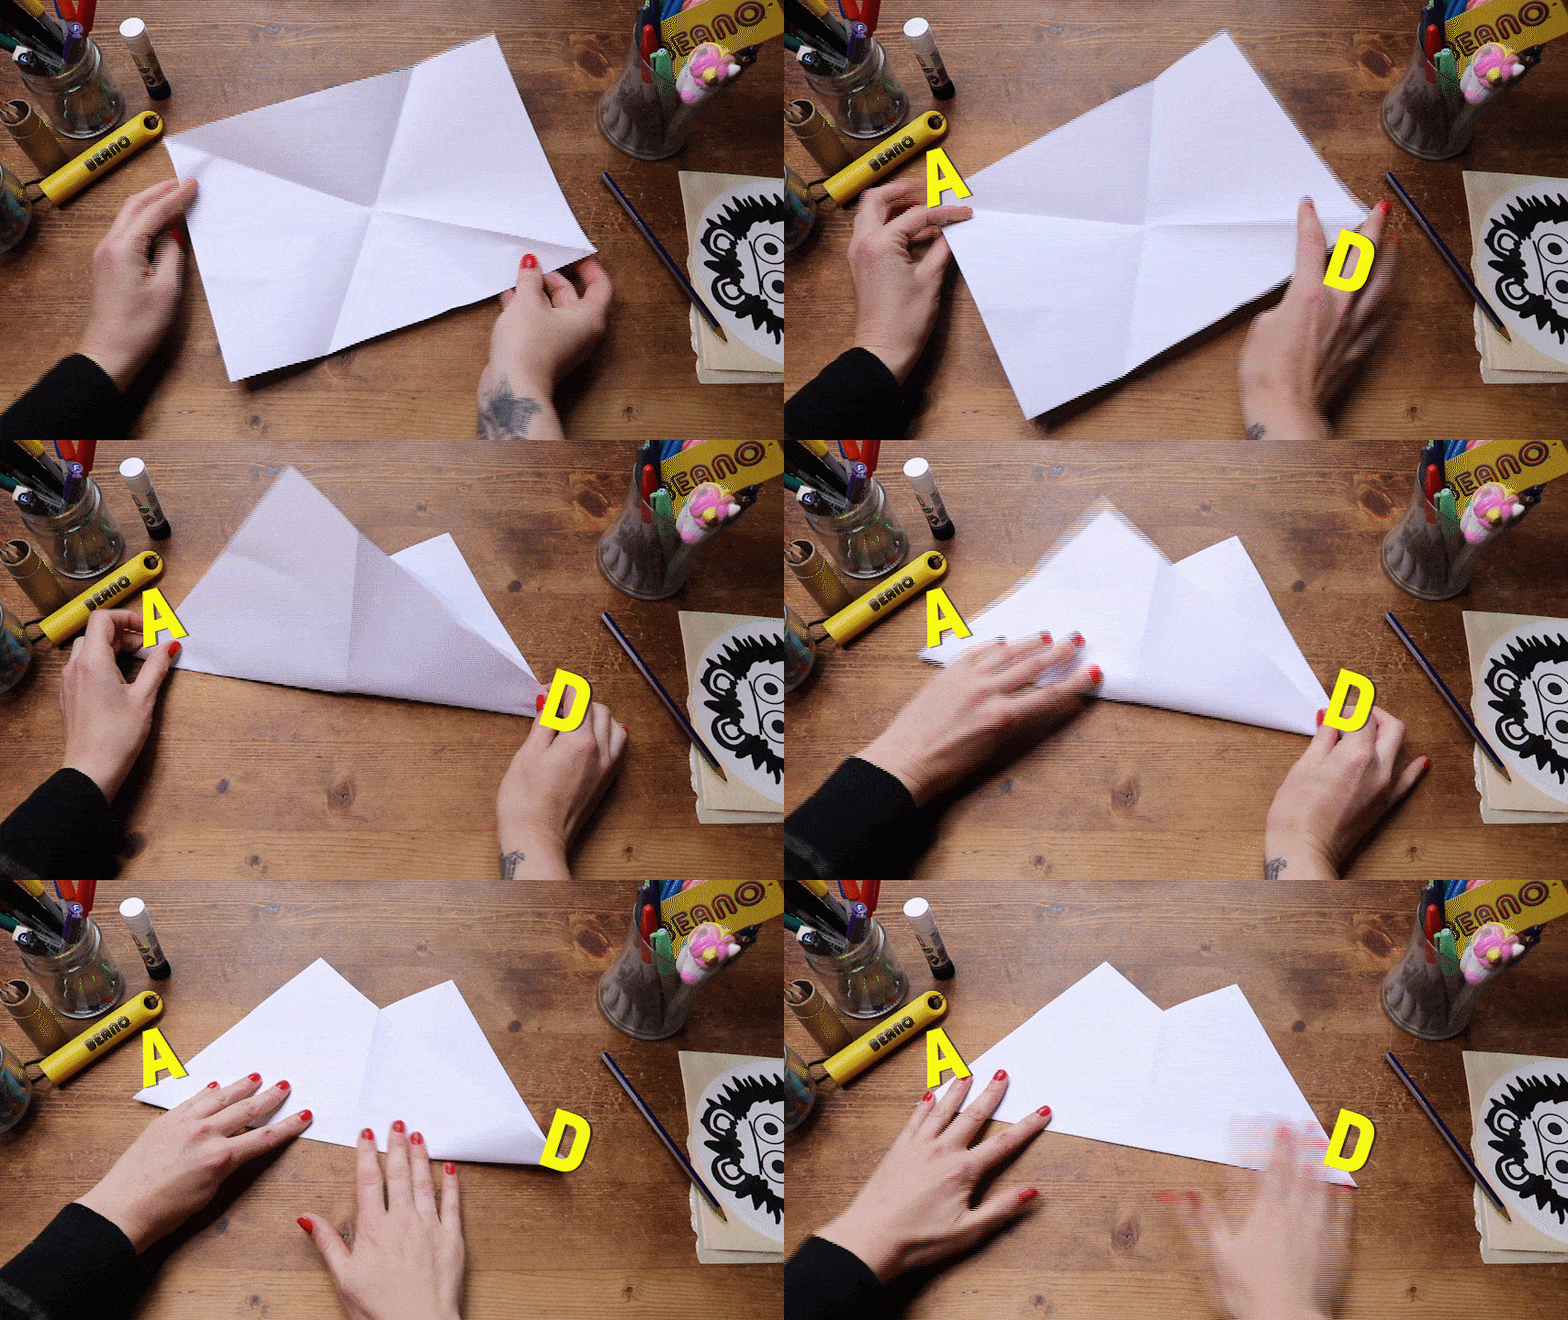
Fold the paper in half. Well, sort of in half! For this step, you fold the paper along the line made between corner A and D.
Step 7
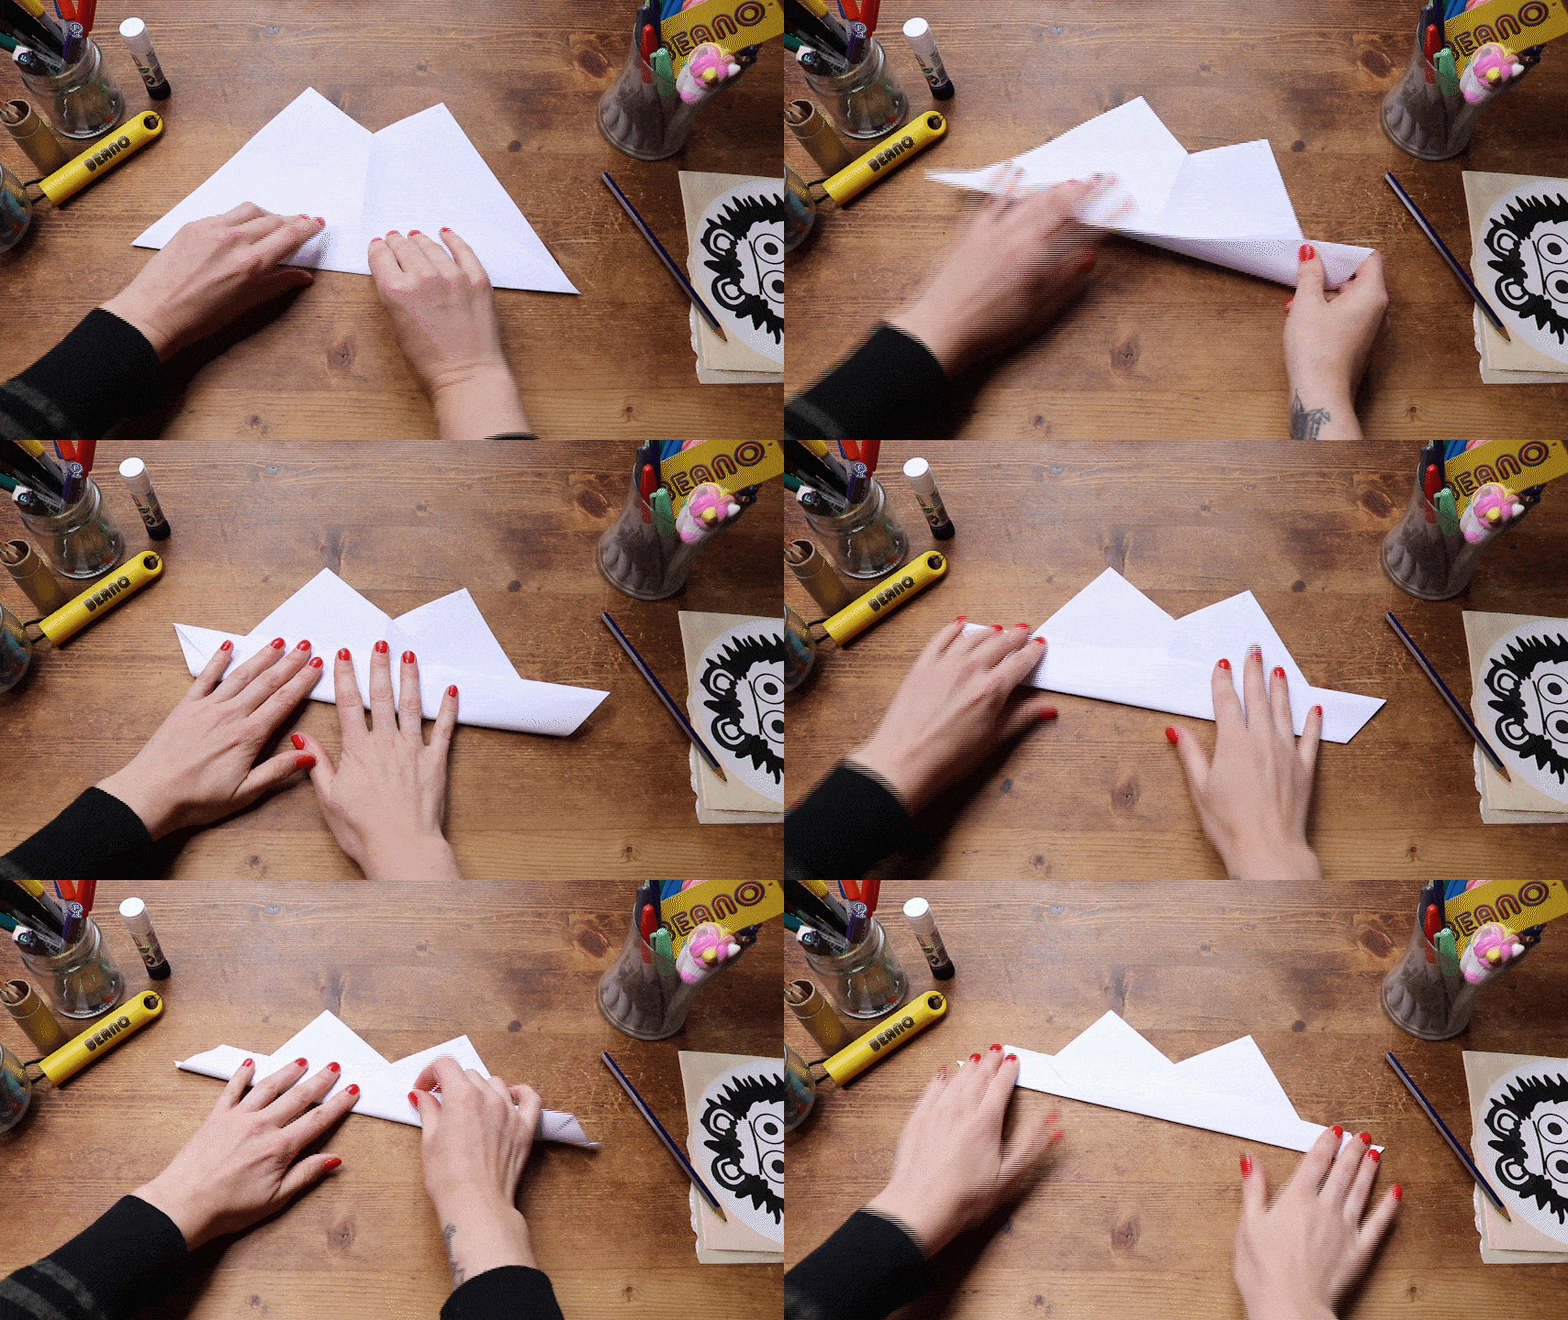
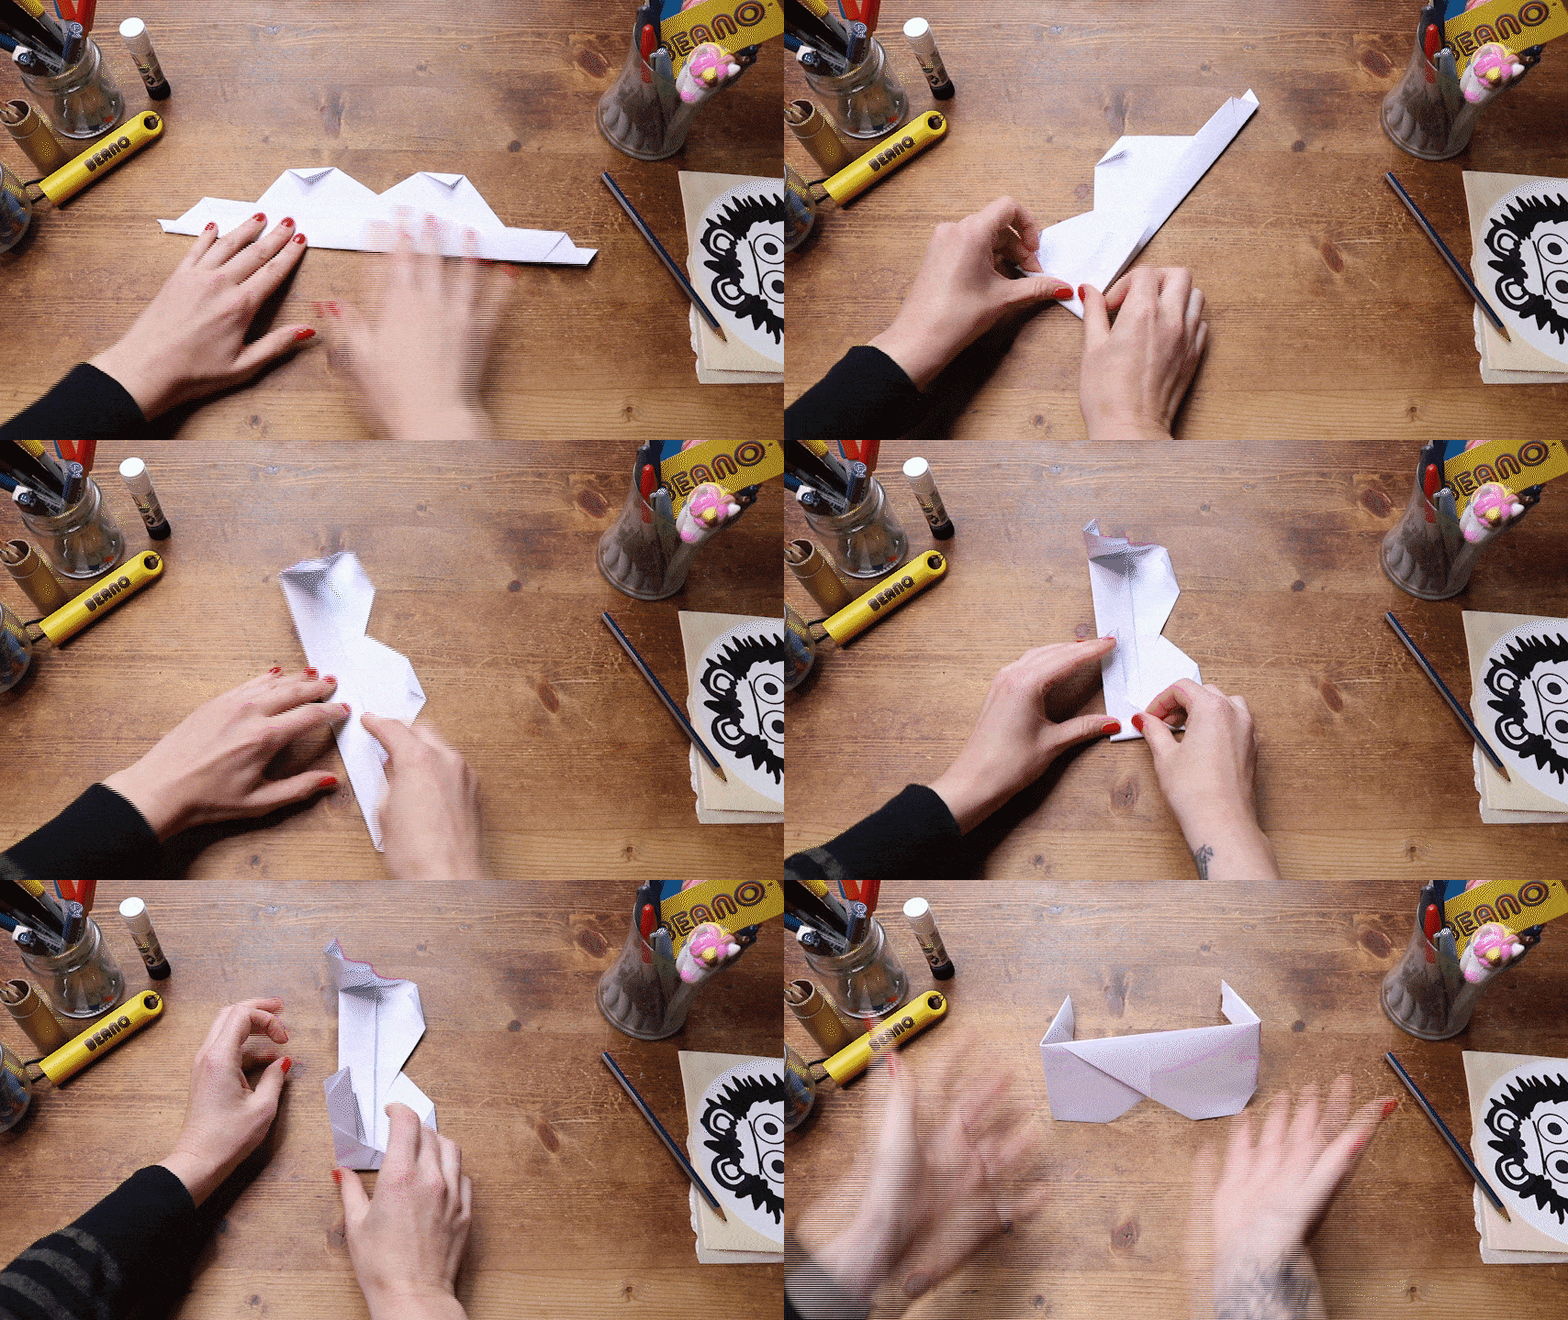
Now fold the long side of the paper TWICE to create a sturdy headband for your staggeringly sensational sunnies.
Step 8
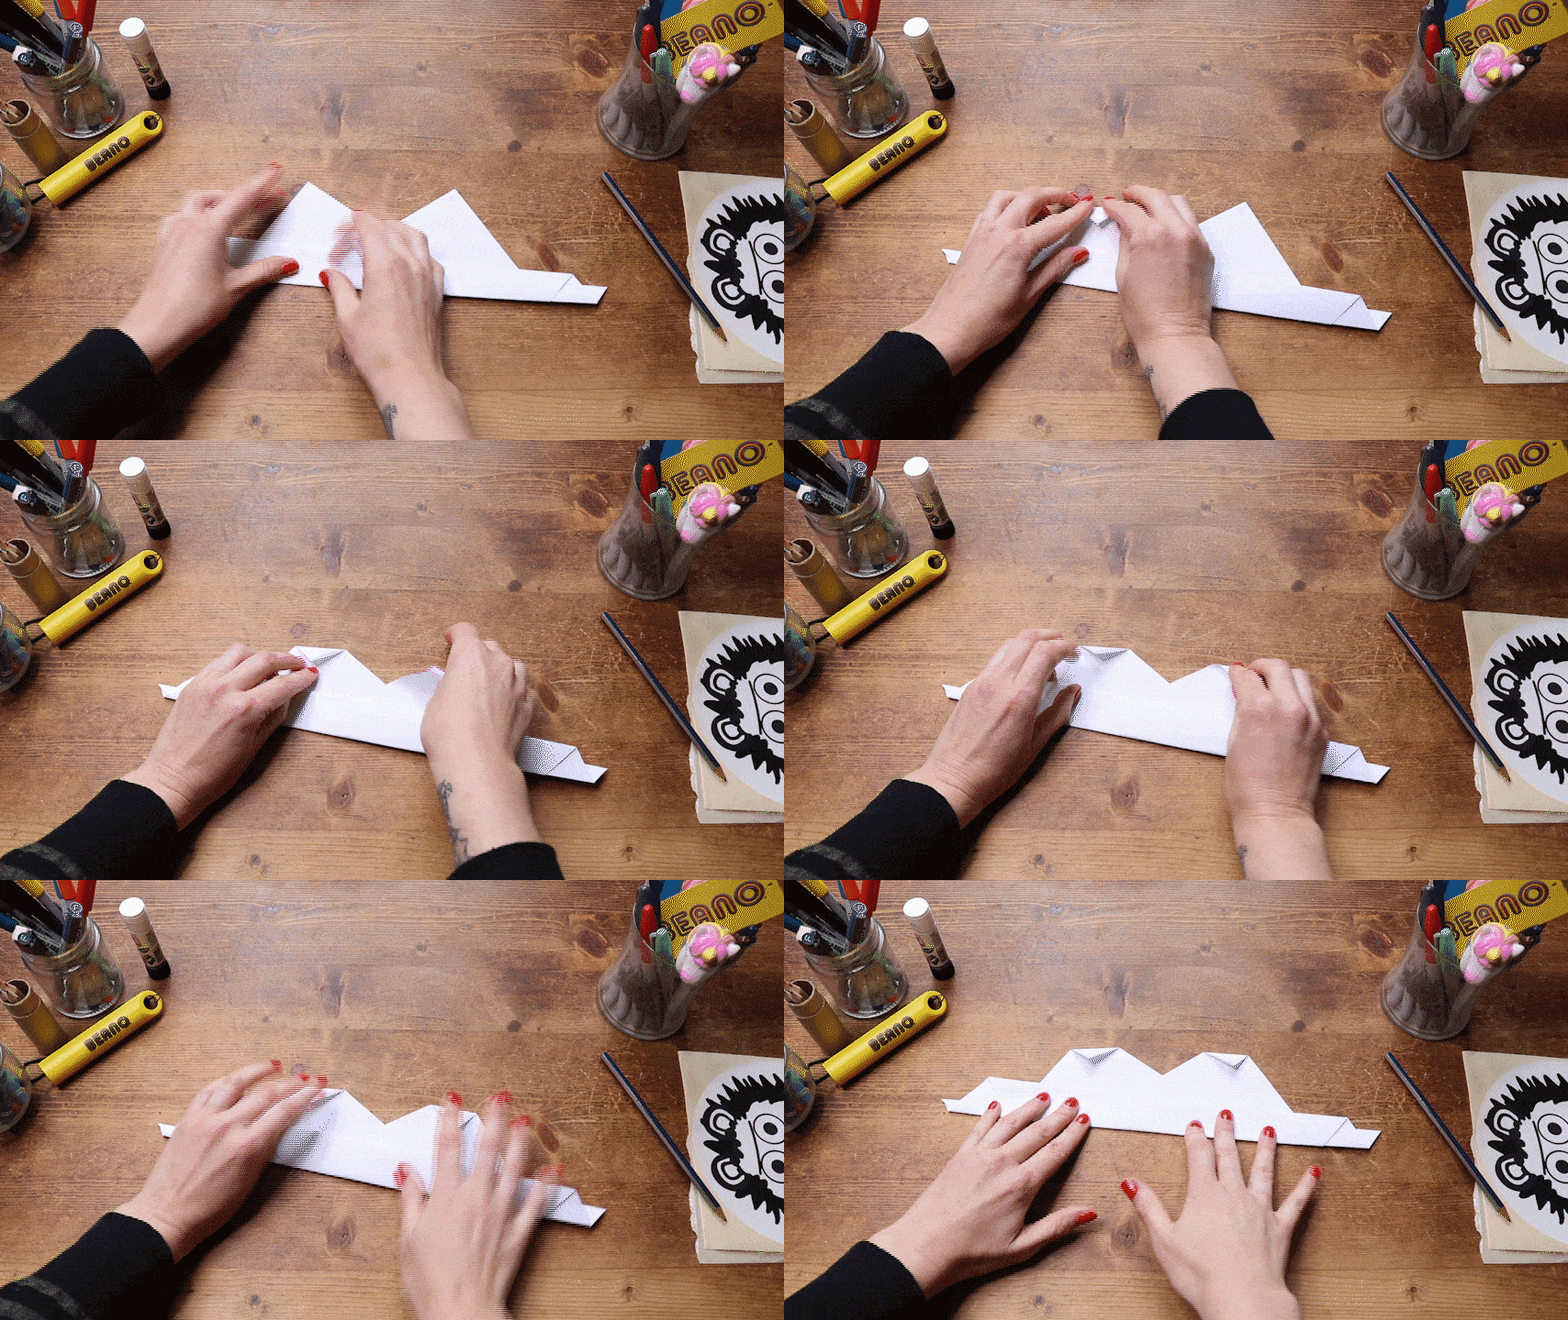
It's starting to get a little tricky. Make a little fold at the bottom of each triangle of your ‘lenses’.
Step 9
Fold in the side of your headband to create ‘arms’ for your sunglasses. And that’s it! You have your basic origami sunglasses. Now for the REALLY fun bit!
Step 10
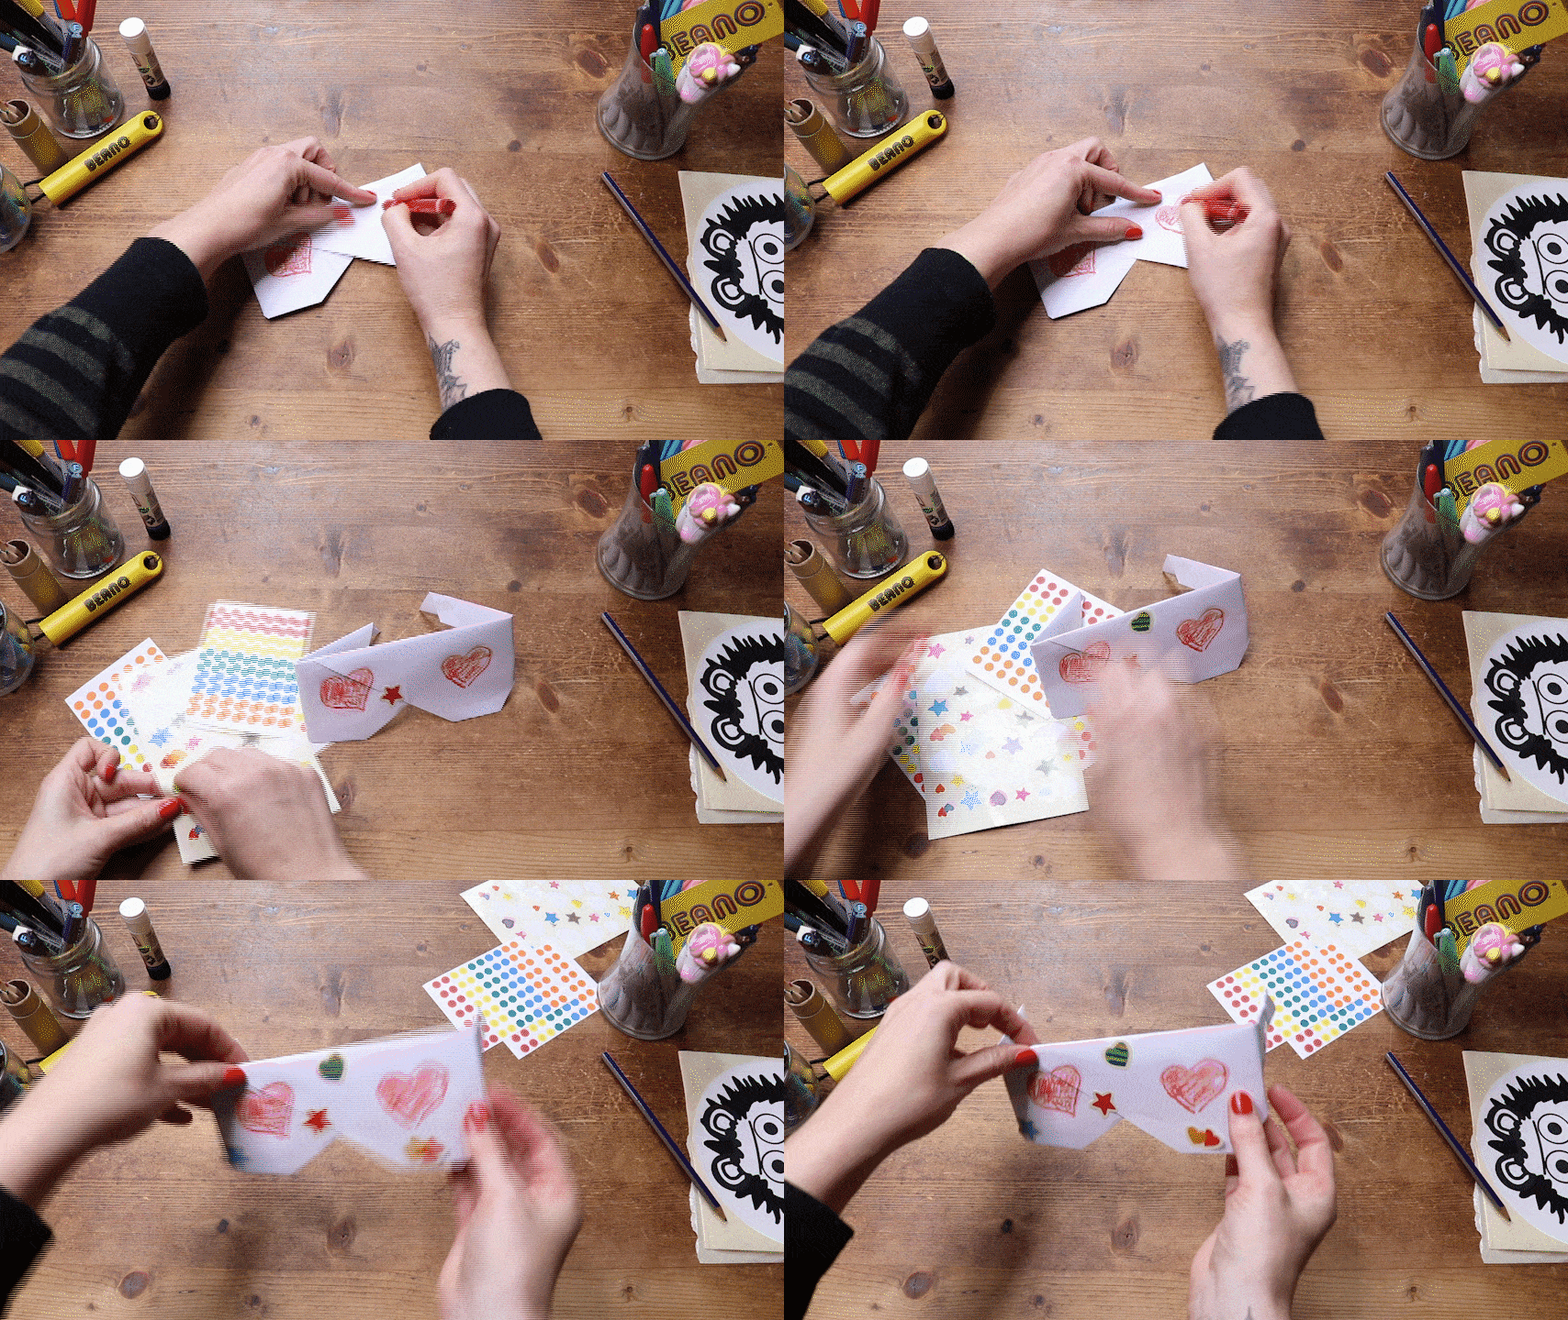
This is where you harness all your creative skills and be the type of 'makes-their-own-paper-sunglasses' GENIUS you've always dreamed you could be. Well, prepare to celebrate, young origami apprentice - for the day is at hand! Use pens and pencils, stickers and glitter – whatever you’ve got. Make it bright and fun so that you’re ready for your Summer of Adventure! You ideally want to be saying to the world - "I'm here with folded paper on my face and I'm FABULOUS."
Step 11
Finally, it's super important to remember that if you're walking down the street in sunglasses with no eyeholes, you're making a statement - and not a good one. Unless your sunglasses have eyeholes you won't be able to see. This will result in excessive stumbling and falling over. Use the pencil to poke two holes in where your eyes will be.
ALSO SUPER IMPORTANT: Don't be wearing the glasses when you poke the eyeholes in, this will almost certainly result in a hospital visit.

Step 11
Own it! Pop your new sunglasses on and walk down the street as if you own the entire town!


